The first time you run out of wipes mid-bathroom trip, real urgency sets in. You start scanning under the sink, pulling open every cabinet. That moment of frustration sent me searching for alternatives — and what I found was surprisingly good news. Learning how to make flushable wipes at home is much easier than it sounds, and the result is a product you can actually trust. If you care about what goes on your body — especially if you're navigating skin sensitivity or post-treatment recovery — this is one of those simple wellness and lifestyle swaps that pays off quickly.
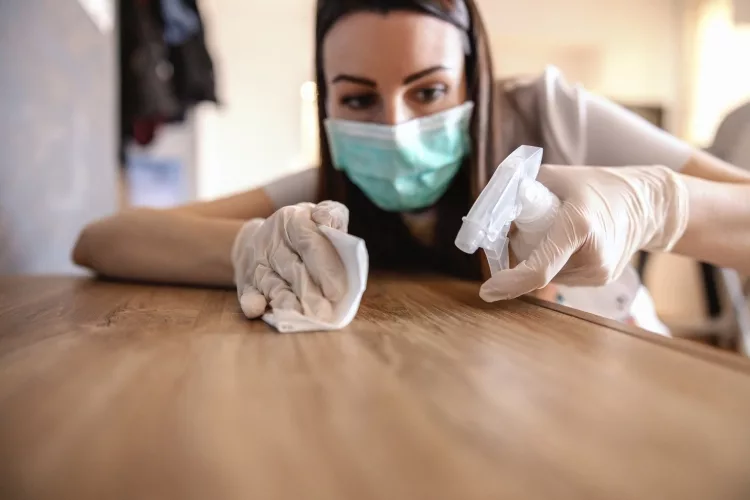
Commercial wipes are convenient, but they often come loaded with synthetic fragrances, alcohol, and preservatives. According to Wikipedia's overview of wet wipes, many products labeled "flushable" are actually made from synthetic fibers that break down far more slowly than toilet paper — causing real problems for plumbing and sewage systems. Making your own with genuinely biodegradable materials sidesteps all of that. If you're curious how homemade wipes stack up against store-bought options, our guide to the best flushable wipes gives you a helpful comparison to start from.
This post walks you through the full picture: when DIY wipes make sense, what ingredients actually work, myths worth ignoring, and the habits that separate wipes that perform well from ones that cause irritation or plumbing headaches. Let's get into it.
Contents
- When DIY Wipes Work Best — And When to Skip Them
- Simple Recipes vs. Advanced Formulas for How to Make Flushable Wipes
- Getting Your First Batch Done Fast
- What People Get Wrong About Flushable Wipes
- Best Practices for Wipes That Actually Perform
- Small Tweaks That Make a Big Difference
- Frequently Asked Questions
- Key Takeaways
When DIY Wipes Work Best — And When to Skip Them
The Right Situations for Homemade Wipes
DIY flushable wipes shine in specific circumstances. If you have sensitive skin that reacts to fragrances or preservatives, making your own gives you complete ingredient control — you know exactly what's going on your body and nothing else. The same logic applies to anyone recovering from surgery, radiation treatment, or a skin condition that makes commercial additives a real irritant.
Cost is another honest factor. A pack of commercial wipes costs a few dollars and runs out fast, especially in a family household. Once you have a basic setup, the per-use cost drops significantly — most people find the upfront investment in simple ingredients pays for itself within a month or two. If you're also interested in reducing plastic packaging in your bathroom, using paper towels or biodegradable cloth as your base material is a straightforward way to cut down on single-use plastic.
And honestly — if you enjoy making things yourself, this is a satisfying one to add to your routine. It takes less than ten minutes, uses ingredients you probably already have, and gives you a product tailored to exactly what your skin needs right now.
Times When Store-Bought Is the Smarter Call
That said, DIY isn't always the right answer. If you're traveling, staying somewhere with limited storage, or just need something immediately, reaching for a commercial option is completely reasonable. There's no award for inconveniencing yourself. Similarly, if you're immunocompromised or managing an active wound or infection, it's worth talking to your doctor before experimenting with homemade formulas — even gentle ingredients can occasionally cause problems in those situations.
If the idea of tracking down ingredients, prepping batches, and managing shelf life sounds like more effort than it's worth, you're not alone. Some people try DIY wipes once, decide it's not for them, and that's a perfectly valid outcome. You might also explore simpler alternatives — our roundup of toilet paper sprays covers options that deliver some of the same skin benefits without any prep work at all.
Pro tip: If you're new to DIY hygiene products, start with a batch of five to ten wipes before scaling up — that way, you can test your skin's reaction without wasting materials if the formula needs adjusting.
Simple Recipes vs. Advanced Formulas for How to Make Flushable Wipes
The Simple 3-Ingredient Starter Recipe
If you've never made wipes before, start here. The basic recipe uses just three things: water, a gentle liquid soap, and a light oil. The water forms the base, the soap does the cleaning, and the oil adds moisture so the wipe doesn't feel harsh against your skin.
A reliable ratio is one cup of warm distilled water, one tablespoon of liquid castile soap or unscented baby wash, and one teaspoon of fractionated coconut oil — the kind that stays liquid at room temperature. Mix them gently (you don't want a lot of bubbles) and pour the solution over a stack of paper towels or cut cloth squares in a sealed container. Distilled water matters here because tap water contains minerals and sometimes trace bacteria that shorten shelf life considerably.
If you're using a half roll of paper towels with the cardboard tube removed, you can pull wipes from the center one at a time. A round container like a large yogurt tub or an old commercial wipe container works perfectly for this setup.
Upgraded Formulas for Sensitive Skin
Once you're comfortable with the basics, you can add more targeted ingredients. Aloe vera gel brings soothing and anti-inflammatory properties — helpful if your skin tends toward redness or irritation. Witch hazel (a natural astringent) helps with odor control without the harshness of alcohol. A few drops of tea tree oil provide mild antimicrobial action, though it needs to be well diluted and used cautiously on very sensitive skin.
Here's a quick comparison of the most common formula ingredients to help you decide what fits your needs:
| Ingredient | Purpose | Best For | Notes |
|---|---|---|---|
| Distilled water | Base/carrier | Everyone | Essential — don't substitute tap water |
| Castile soap | Cleansing | General use | Choose unscented for sensitive skin |
| Baby wash | Gentle cleansing | Very sensitive or delicate skin | Low-irritation, mild formula |
| Fractionated coconut oil | Moisture | Dry or post-treatment skin | Stays liquid, absorbs easily |
| Aloe vera gel | Soothing | Irritated or reactive skin | Use pure — not flavored varieties |
| Witch hazel | Odor control, mild astringency | Active lifestyles, warm climates | Choose alcohol-free version |
| Tea tree oil | Antimicrobial | Occasional use, odor concerns | Dilute well — two to three drops only |
Getting Your First Batch Done Fast
What You Actually Need Before You Start
You don't need specialty equipment. Gather distilled water (available at any grocery store), your chosen soap, a light oil, a sealable container, and your base material. That's the whole list. An old commercial wipe container is ideal, but a large mason jar or a round food container with a tight lid all work just as well.
For the base material, your choice matters more than most people realize. Thin, single-ply paper towels are the most genuinely flushable option — choose a brand that breaks apart easily in water. Thicker, quilted varieties are harder to flush safely and can cause blockages over time. Reusable cloth wipes cut from old t-shirts or flannel are wonderfully soft and eco-friendly, but they belong in a small bin near the toilet, not down it.
Step-by-Step for Your First Try
Mix your solution first, then pour it over your base material. Keep it simple:
- Combine one cup of distilled water, one tablespoon of castile soap, and one teaspoon of fractionated coconut oil in a small bowl. Stir gently to combine without creating too many bubbles.
- Place your paper towel squares (or a half-roll with the cardboard tube removed) into your container. Pour the solution slowly and evenly over them. Wait two to three minutes for full absorption, then seal the lid.
Aim for small batches — enough for three to five days at a time. Without commercial preservatives, larger batches can develop bacteria or mold before you use them all. Storing your container in a cool spot away from direct sunlight helps extend freshness. Most people find that room temperature in a closed cabinet works perfectly well for short batches.
Important: Never flush cloth wipes or thick paper towels — only paper-based materials that are genuinely water-dispersible belong in the toilet. When in doubt, use the trash.
What People Get Wrong About Flushable Wipes
The "All Wipes Are Flushable" Problem
One of the most persistent myths is that any wipe with "flushable" on the label is actually safe to flush. Wastewater utilities across the country have documented the damage that even marketed-as-flushable commercial wipes cause to sewer systems. The word "flushable" on a package technically means the product will go down the drain — not that it will break down quickly enough to avoid problems downstream.
Genuinely flushable DIY wipes use thin, single-ply paper that disperses in water the same way toilet paper does. If you're making cloth wipes, they're excellent for many uses, but the toilet isn't one of them. Getting clear on this distinction is probably the most important practical takeaway when you're learning how to make flushable wipes — it protects your plumbing and prevents a headache that's entirely avoidable.
Clearing Up Ingredient Confusion
Another common misconception is that "natural" automatically means safe for all skin types. Tea tree oil, for example, is a natural ingredient — but it can cause contact dermatitis (a red, itchy skin reaction) in some people, especially at higher concentrations. Essential oils in general should always be heavily diluted before going anywhere near sensitive areas of the body.
There's also confusion around alcohol. Some people add a splash of rubbing alcohol thinking it will preserve their wipes longer or offer stronger antimicrobial action. In practice, alcohol dries out skin quickly and worsens irritation — particularly for anyone dealing with post-treatment skin changes. Witch hazel is a gentler alternative that offers some of the same benefits without the harshness, and it's widely available at drugstores. The simpler your formula, the less room there is for an unexpected reaction.
Best Practices for Wipes That Actually Perform
Choosing the Right Base Material
Your base material affects everything — how the wipe feels, how well it cleans, and whether it's safe to flush. Thin paper towels are the most commonly recommended choice for DIY flushable wipes because they're soft enough for sensitive skin and break down in water faster than thicker alternatives. Some people use toilet paper folded into squares, which works in a pinch but tends to fall apart before use if it absorbs too much liquid at once.
If flushing isn't a requirement, reusable flannel or soft cotton squares are an excellent option. Cut them from old shirts or buy pre-cut baby washcloths in bulk — these can be washed, dried, and reused dozens of times. Designating a small covered bin near the toilet for used cloth wipes keeps things tidy until laundry day and makes the reusable option genuinely practical for everyday life.
Storing and Preserving Your Wipes Safely
Storage directly affects how long your wipes stay fresh and safe to use. An airtight container is non-negotiable — exposure to air dries them out and allows airborne bacteria to settle in. Old commercial wipe containers work beautifully because they're designed for exactly this purpose. Mason jars with tight lids are another reliable option.
Keep your container away from direct sunlight and heat, both of which accelerate bacterial growth. Without added preservatives, plan to use your batch within three to five days. If your formula includes witch hazel or a few drops of tea tree oil, it may hold up a day or two longer — but the safest habit is still making small, frequent batches. Think of it like making a fresh salad dressing: better in small amounts, more often.
Small Tweaks That Make a Big Difference
Customizing for Your Skin Type
The real advantage of making your own wipes is the ability to tailor the formula precisely to what your skin needs right now. Dry skin benefits from a slightly heavier oil component — bump your coconut oil from one teaspoon to two, or try adding a few drops of jojoba oil, which closely mimics the skin's natural sebum. Oily or acne-prone skin does better with a lighter formula — skip the oil entirely and use aloe vera as your moisture source instead.
If you're going through cancer treatment or recovering from surgery, your skin may be more reactive than usual for a period of time. In those cases, simpler is genuinely better. Stick to distilled water, unscented baby wash, and a small amount of oil until you understand how your skin is responding. You can always layer in more ingredients later when things stabilize — there's no rush to build a complex formula when your skin needs gentleness most.
Fragrance and Feel Adjustments
Fragrance is where experimentation is tempting — and also where it's easiest to accidentally trigger irritation. If you want a light scent, lavender essential oil is one of the gentler options, kept to two or three drops per cup of solution. Peppermint feels refreshing but is more likely to cause irritation on sensitive or broken skin, so use it cautiously and test a small area first.
For a cooling sensation without any fragrance at all, a small amount of pure aloe vera does the trick naturally. You can also adjust texture — a little more oil gives the wipe a silkier feel, while less oil and more witch hazel creates something closer to a cleansing pad. Finding your ideal formula usually takes two or three small-batch experiments. Keep brief notes on what you change each time so you can recreate the version that works best without having to guess again.
Frequently Asked Questions
Can I really flush homemade wipes?
Only if your base material is thin, single-ply paper that breaks apart in water — similar to how toilet paper behaves. Cloth wipes and thick paper towels should never be flushed, regardless of what solution you add. When in doubt, the trash is always the safer choice.
How long do homemade wipes last before they go bad?
Without commercial preservatives, most homemade wipes stay fresh for three to five days at room temperature in a sealed airtight container. Adding witch hazel or a few drops of tea tree oil can extend this slightly. The safest habit is making small, frequent batches rather than one large one.
What soap works best for DIY wipes?
Unscented castile soap or gentle baby wash are the most widely recommended choices. Both clean effectively without harsh detergents that can disrupt skin's natural balance. Always choose unscented versions if you have sensitive skin or are applying near delicate areas.
Is it safe to make homemade wipes after surgery or cancer treatment?
It can be, but keeping the formula simple is important during recovery. Stick to distilled water, unscented soap, and a light oil — and avoid essential oils until your skin has had time to stabilize. It's always worth checking with your medical team before introducing new products if you're unsure.
Why do I need distilled water? Can I use tap water?
Tap water works in a pinch, but it contains minerals and sometimes trace bacteria that shorten your wipes' shelf life noticeably. Distilled water gives you a cleaner base and helps the batch stay fresh longer. It's widely available and inexpensive — worth the small extra step.
What's the best container for storing homemade wipes?
An old commercial wipe container is the most convenient option — it's designed for exactly this use and dispenses one wipe at a time cleanly. Mason jars, round food containers, or any airtight container with a secure lid all work well too. The key is a tight seal that prevents drying out and contamination.
Are essential oils safe to include in a wipe solution?
Some are, when diluted properly. Lavender is among the gentler options and is generally well tolerated. Use no more than two to three drops per cup of solution, and test on a small skin area before using near sensitive spots. Avoid essential oils entirely on broken, inflamed, or post-treatment skin.
How do homemade wipes compare to commercial ones?
Homemade wipes give you full ingredient control and a lower ongoing cost, but they require more preparation and lack the preservatives that extend commercial products' shelf life. If you want to see what the store-bought market offers as a reference point, our review of the best flushable wipes covers the top options with honest comparisons.
Key Takeaways
- Learning how to make flushable wipes is genuinely simple — a basic recipe needs just three ingredients: distilled water, gentle soap, and a light oil.
- Only thin, single-ply paper that disperses in water is truly safe to flush — cloth wipes and thick paper towels belong in the trash, not the toilet.
- Make small batches for three to five days at a time and store them in an airtight container to keep them fresh without commercial preservatives.
- Keep your formula simple if your skin is sensitive or recovering from treatment, and customize gradually once you know how your skin responds.



About Paulette Leaphart
Paulette Leaphart is a breast cancer awareness advocate and writer whose personal journey through diagnosis, treatment, and recovery shapes everything published on this platform. After experiencing the physical and emotional toll of breast cancer firsthand, she dedicated herself to creating a space where women can find honest information, community, and encouragement — covering beauty and personal care for people navigating treatment, fashion and style resources for survivors, and wellness content rooted in real lived experience rather than clinical distance.
About the Author

It's me Emily MacKenzie tried to make a documentary film about breast cancer according to the experience of Paulette Leaphart. Now it is no longer possible for some reason. But I'm not disappointed and I'm very hopeful that I can do something very positive that brings awareness to the women of the devastating disease ''Breast cancer". Just stay with me and keep supporting this platform; you will get update time to time and can know everything about ''Breast Cancer''.
You can get FREE Gifts. Or latest Free phones here.
Disable Ad block to reveal all the info. Once done, hit a button below