Have most people ever adjusted a bra strap for the tenth time in a morning, only to walk out the door with it showing anyway? The fix is already sitting in a bathroom drawer. How to hide bra straps with nothing more than a hair tie is one of those small styling tricks that delivers a surprisingly big payoff, and our team at The Scar Story wellness and lifestyle community has been recommending it for years. No sewing. No shopping trip. No special equipment required.
The method works by looping a hair tie around both bra straps at the back, drawing them toward the center so they tuck neatly under almost any top. It takes about ten seconds. Our team has tested this on off-shoulder blouses, tank tops, casual tees, and going-out tops — and the results hold up every time.
Most people reach for a strapless bra or a racerback converter when straps become a problem. Both options work in specific situations, but they come with trade-offs: strapless bras shift throughout the day, and converters are easy to misplace. The hair tie method avoids all of that. Below, our team covers the exact technique, how it performs with different outfits, what can go wrong, and what everything actually costs.
Contents
- The Hair Tie Method: How to Hide Bra Straps in Seconds
- How the Hack Performs Across Different Outfits
- Why Bra Straps Still Show — and What Our Team Does Differently
- When the Hair Tie Trick Does Not Cooperate
- Keeping Bra Straps Hidden from Morning to Night
- What Hiding Bra Straps Actually Costs
- Frequently Asked Questions
- Key Takeaways
The Hair Tie Method: How to Hide Bra Straps in Seconds
This is the core technique — simple, reversible, and requiring no tools beyond a hair tie. Our team considers it the most practical and immediate solution in the styling toolkit for managing visible straps.
What Kind of Hair Tie Works Best
Not all hair ties perform equally here. Thin elastic bands can snap under tension or cut into the back uncomfortably after extended wear. Our team recommends a medium-thickness elastic in a neutral color — black, beige, or white. Matching the hair tie to the bra strap color gives the cleanest result if any part of the tie is visible from behind. Fabric-covered elastics grip better and resist rolling, which means they stay in place longer throughout the day. Spiral or phone-cord style ties add unnecessary bulk and do not lie flat against the back.
According to Wikipedia's overview of brassiere construction, strap width and material vary significantly across bra styles — which is exactly why a universal fix like this one is so useful regardless of what type of bra is already in the wardrobe.
Step-by-Step Instructions
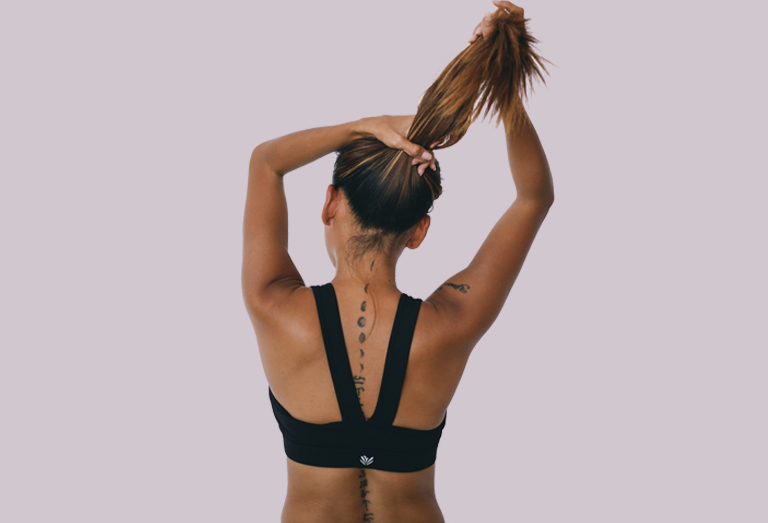
Put the bra on as normal. Reach behind and locate both straps. Slide the hair tie onto one strap, stretch it across the back, and loop it around the second strap. Both straps should now be drawn toward the center of the back. Slide the tie up or down until the straps sit comfortably close together without digging in. The back should resemble a racerback style once the adjustment is in place.
One thing our team always double-checks: the front. Pulling straps inward at the back shifts the cups slightly forward, so a quick repositioning of the cups after adjusting keeps everything correctly placed. This step adds five seconds and makes the difference between a polished look and a lopsided one.
How the Hack Performs Across Different Outfits
The hair tie method works with more outfit categories than most people expect. Our team has tested it across a wide range of styles, and the results depend mostly on strap width and fabric opacity.
Off-Shoulder and Cold-Shoulder Tops
These are the outfits where bra straps are most likely to cause problems — and where the hair tie fix delivers the most dramatic improvement. Pulling both straps toward the center of the back keeps them out of sight even when the neckline shifts during movement. Our team's experience is that slightly tightening the straps before applying the tie gives the best result: straps that are too loose drift outward even after being gathered.
For anyone dealing with a particularly stubborn strap situation, our guide on how to keep a strapless bra in place covers a complementary approach that works well for sleeveless or bare-shoulder styles when a more complete solution is needed.
Tank Tops and Racerback Styles
Narrow-strap tanks are trickier. The hair tie still works here, but the starting bra matters more. A bra with thinner straps pairs best with narrow-strap tanks — when the bra strap is noticeably wider than the tank strap, the hair tie cannot gather them close enough for a clean result. Our team recommends pairing a thin-strap bra with the hair tie method for tanks — that combination is nearly invisible under most fabrics.
Racerback tops are an interesting case. Most people assume a dedicated racerback bra is required, but the hair tie method essentially converts a regular bra into a makeshift racerback in under a minute. No specialty purchase needed.
Pro tip from our team: Keeping two or three neutral-colored hair ties in a bag at all times is one of the most underrated styling habits out there — a ten-second mid-day fix is worth far more than any bra accessory that requires advance planning.
Why Bra Straps Still Show — and What Our Team Does Differently
The hair tie method is simple, but small errors make it far less effective than it should be. Our team has seen the same mistakes repeated consistently, and addressing them makes an immediate difference.
Choosing the Wrong Hair Tie
The most common mistake is grabbing whatever tie is nearest. Brightly colored elastics are visible under light fabrics. Thick elastics create a noticeable lump under a fitted top. Our team is direct about this: the hair tie is part of the outfit when using this method, so choosing it thoughtfully is not optional — it is the whole point. A thin, neutral elastic disappears. A neon scrunchie absolutely does not, especially under a white shirt.
Skipping the Mirror Check
Most people check the front before heading out. The back gets ignored. This is where the method appears to fail — not because the hair tie slipped, but because nobody checked. Our team does a full back-facing check every time. A door mirror, or a quick photo taken from behind, catches anything a front-only view misses. Placement matters just as much as tie selection. Positioning the tie too low — near the bra band — creates pressure and does not pull straps inward effectively. The sweet spot is mid-back, roughly level with the shoulder blades, where the straps have enough length to angle inward without straining.
Understanding why bra straps fall down in the first place is worth reading before relying on this hack for every situation — sometimes the hair tie is exactly the right fix, and sometimes the bra itself is the underlying problem.

When the Hair Tie Trick Does Not Cooperate
Even a reliable method has edge cases. Our team has encountered all of the common failure points and knows exactly what to do about each one.
The Strap Keeps Slipping Out
If the tie keeps loosening throughout the day, the elastic has too much stretch relative to the distance between the straps. Our team's fix: layer two ties together for more combined tension, or switch to a smaller-circumference elastic. The goal is a tie that holds both straps firmly without snapping under normal movement. Looping the tie twice around each strap before connecting them adds more friction and keeps the setup stable through a full day of activity.
The Back Digs In or Bunches Up
This typically means the tie is positioned right where the bra band already sits, stacking pressure on a single point. The tie should sit a few inches above the bra band, where the straps have enough length to be drawn together without compressing on top of the band. If discomfort persists after repositioning, the issue is almost always the bra's fit rather than the technique. A band that is too loose will shift and bunch regardless of what is done to the straps above it.
Keeping Bra Straps Hidden from Morning to Night
Getting straps under control for a morning outing is straightforward. Keeping them that way through a full, active day takes a small amount of planning — but not much.
Bra Fit Is the Foundation
Our team returns to this point consistently because it matters more than any hack. No strap-hiding method works reliably on a bra that does not fit. Straps that migrate outward are usually straps that are not properly tightened, on a bra that has stretched out with age, or on a bra in the wrong size entirely. A well-fitting bra makes every other trick work better — and skipping this step means fighting a losing battle from the start regardless of how many hair ties are on hand.
Refreshing the Hack on Long Days
The hair tie can shift after several hours, especially during active days involving a lot of movement. Our team keeps a spare elastic in a pocket or small bag for a quick reset when needed. The whole process takes about thirty seconds in a restroom — remove the existing tie, readjust both straps, loop a fresh one into place. On a typical day, most people need to do this at most once. Keeping two spare ties on hand is the simplest way to stay prepared without overthinking the logistics.
What Hiding Bra Straps Actually Costs
One of the strongest arguments for the hair tie method is the price. Our team has compared every available option, and the cost difference is not close.
Free and Almost-Free Options
A bag of 100 hair ties typically costs less than five dollars. Most people already own several. The method is essentially free for anyone who ties up their hair regularly. The comparison to other options is worth laying out clearly:
| Method | Average Cost | Reusable? | Works with Any Bra? |
|---|---|---|---|
| Hair tie | $0–$1 | Yes | Yes |
| Bra clip / racerback converter | $2–$5 | Yes (until lost) | Yes |
| Fashion tape / adhesive strips | $5–$10 | No | Partial |
| Convertible multi-way bra | $20–$50 | Yes | N/A (replaces bra) |
| Strapless bra | $15–$60 | Yes | N/A (replaces bra) |
When It Makes Sense to Spend More
Our team is direct about this: for everyday use, the hair tie is the right call. It costs nothing, works immediately, and requires no planning. But for formal occasions — a wedding, a significant event, anything requiring a polished look for several hours — investing in a quality convertible or strapless bra is worth it. Some outfits demand a more permanent solution, and a well-made strapless bra provides that without requiring any mid-evening resets.
The hair tie is also not a substitute for a bra that has genuinely worn out. Stretched straps, a loose band, and thinned fabric are signals that replacement is the actual fix. Our team recommends replacing daily-wear bras every six to twelve months — the investment pays off in comfort and in how well every outfit sits from that point forward.
Frequently Asked Questions
Can the hair tie method work with a backless top?
Not in most cases. Backless tops expose the entire rear of the torso, which means the gathered straps and the hair tie itself would be fully visible. Our team recommends a strapless or adhesive bra for truly backless styles. The hair tie method performs best on tops that have at least some back coverage to conceal the gathered straps.
Does looping a hair tie around bra straps damage them over time?
With occasional use, the risk is minimal. Our team rotates between several ties to avoid repetitive wear on the same section of strap. For daily use with the same tight tie, there is a small possibility of fabric wear at the contact point over several months of continuous use. Fabric-covered elastics are noticeably gentler on strap material than bare rubber elastic.
How does a hair tie compare to a dedicated racerback converter clip?
A racerback clip performs essentially the same function as a hair tie, but it is smaller, easier to lose, and costs more. Our team prefers the hair tie because it is almost always already available and costs nothing extra. For anyone who prefers a more purpose-built accessory, a clip is a reasonable investment at two to five dollars.
What should be done when the top fabric is too thin for any fix to work?
Very thin or clingy fabrics reveal every bump underneath, including the hair tie itself. For sheer or ultra-thin tops, our team recommends fashion tape or a dedicated backless adhesive bra rather than this method. The hair tie technique performs best on fabrics with at least a moderate amount of body or opacity that can conceal the gathered elastic at the back.
Is there a specific hair tie color that works for every situation?
A dark nude or skin-tone elastic is the most versatile starting point for most people. Black works well under darker fabrics and pairs well with darker skin tones. Our team keeps both shades on hand because no single color is truly invisible across every combination of bra color, skin tone, and top fabric — having options takes thirty seconds of preparation and saves a lot of frustration.
Can this method be used on sports bras?
Sports bras with adjustable straps can be treated the same way as regular bras, and the method works fine on those styles. Pull-over sports bras without adjustable straps do not benefit from this technique because the straps are integrated into the construction rather than being separate adjustable bands. Our team uses this hack primarily on underwire and soft cup bras rather than athletic-style ones.
How many hair ties should be kept on hand for a full day out?
Our team recommends keeping two to three spares accessible — in a bag, a pocket, or a small zip pouch — when an outfit relies on this technique. One is already in use, and a backup covers a mid-day reset or an unexpected snap. The whole reset process takes about thirty seconds, so being prepared for it makes the method genuinely reliable rather than a one-time morning fix.
Key Takeaways
- A single medium-thickness, neutral-colored hair tie looped around both bra straps at mid-back is the fastest, cheapest, and most widely available fix for hiding straps under most tops.
- Choosing the right tie color, tightening straps before applying it, and doing a back-view check before heading out are the three steps that separate a clean result from a visible one.
- The method works best on tops with some back coverage and pairs most effectively with a properly fitting bra — no amount of hair ties will fully compensate for a band that no longer fits.
- For everyday outfits, the hair tie wins on every measure of cost and convenience; for formal occasions or truly backless styles, a strapless or convertible bra is the better long-term investment.


About Paulette Leaphart
Paulette Leaphart is a breast cancer awareness advocate and writer whose personal journey through diagnosis, treatment, and recovery shapes everything published on this platform. After experiencing the physical and emotional toll of breast cancer firsthand, she dedicated herself to creating a space where women can find honest information, community, and encouragement — covering beauty and personal care for people navigating treatment, fashion and style resources for survivors, and wellness content rooted in real lived experience rather than clinical distance.
About the Author

It's me Emily MacKenzie tried to make a documentary film about breast cancer according to the experience of Paulette Leaphart. Now it is no longer possible for some reason. But I'm not disappointed and I'm very hopeful that I can do something very positive that brings awareness to the women of the devastating disease ''Breast cancer". Just stay with me and keep supporting this platform; you will get update time to time and can know everything about ''Breast Cancer''.
You can get FREE Gifts. Or latest Free phones here.
Disable Ad block to reveal all the info. Once done, hit a button below