Yes, you can get a smooth, even result with self tanner application without mitt — and it doesn't have to look patchy or streaky. With the right substitute and a bit of technique, you'll barely notice the difference. Whether you've misplaced your mitt or just want to know your options, this guide has you covered. For more skin and body confidence tips, visit our wellness and lifestyle section.
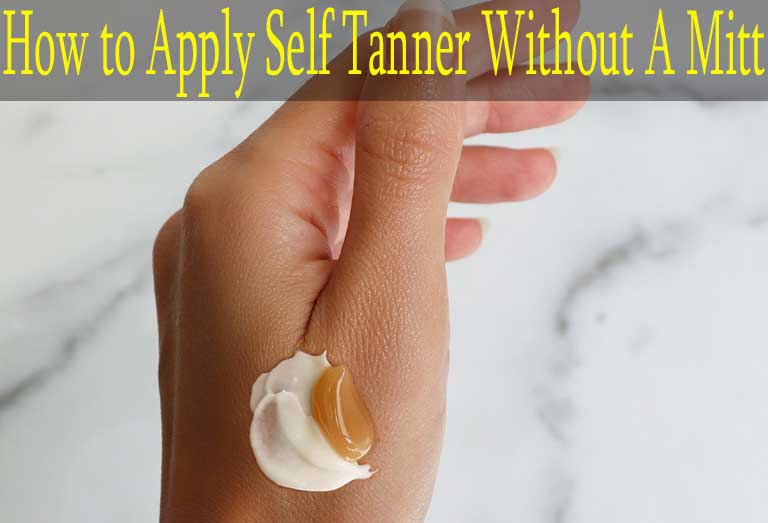
A mitt exists for two reasons: it creates a barrier to protect your palms from staining, and it helps you blend product smoothly across your skin. When you don't have one, the goal is simply to replicate those two things with something else. That's it. The tool matters less than the prep and the motion.
It helps to know what's actually in the bottle. According to Wikipedia, dihydroxyacetone (DHA) — the active ingredient in most self-tanners — reacts chemically with amino acids in the outer layer of your skin to develop color. It doesn't wash off right away because it's not sitting on top; it's reacting with your skin. That's why uneven application or dry patches can lead to uneven color that lasts for days.
Contents
Everyday Items That Replace a Tanning Mitt
You probably already own at least one good substitute. The key is choosing something that applies product smoothly, doesn't absorb too much of it, and protects your hands from staining — or at least makes the stain easier to manage.
The Best Mitt Alternatives
Here are the most reliable options, from best to decent:
- Disposable latex or nitrile gloves — The closest thing to a tanning mitt. They cover your whole hand, protect your palms completely, and let you blend with your fingertips just like normal. Pick these up at any pharmacy for a few dollars.
- A clean makeup sponge — Works beautifully on smaller areas like knees, ankles, and elbows. Dampen it slightly, add a small amount of tanner, and blend in circular motions.
- A dry bath puff or body puff — Good for covering larger areas like your back or thighs. Use a clean, dry one so it doesn't dilute the formula.
- A foam roller or dense foam applicator — Rolls evenly down the legs and arms without too much friction. Keep the pressure light and consistent.
- A foundation or kabuki brush — Useful for detail work. Blend tanner into hairlines, around nails, across feet, and any other edge where you want precision.
- Bare hands with gloves afterward — Apply with clean bare hands, then immediately put on latex gloves to protect against further staining and to help blend the edges. Not ideal, but it works in a pinch.
Being able to see what you're doing clearly makes a real difference — a lighted wall-mounted makeup mirror is genuinely useful when you're checking for unblended edges or missed spots.
| Substitute Tool | Best Body Areas | Palm Protection | Blending Quality | Cost |
|---|---|---|---|---|
| Latex/nitrile gloves | Full body | Excellent | Very good | Very low |
| Makeup sponge | Knees, ankles, elbows | Excellent | Good | Low |
| Bath puff (dry) | Thighs, back, stomach | Excellent | Good | Low |
| Foundation brush | Hairline, feet, hands | Excellent | Good | Low–moderate |
| Foam roller | Arms, legs | Excellent | Moderate | Low |
| Bare hands | Touch-ups only | None | Moderate | Free |
What to Avoid Using
Some things seem like they'd work but will make your life harder:
- Regular bath towels or washcloths — Too absorbent. You'll use up most of your product and still get patchy coverage.
- Cotton pads or cotton balls — Same issue. They soak up the tanner before it even touches your skin.
- Paper towels — Leave streaks, shred apart, and don't blend at all.
- Rough exfoliating gloves — Great for prep, bad for application. The texture creates uneven color and can irritate skin.
- Silicone scrubbers — Too stiff to blend product smoothly across curved body surfaces.

When to Skip the Mitt — And When Not To
Going mitt-free is fine in some situations and a gamble in others. Knowing the difference saves you from a week of uneven color.
Situations Where It's Fine to Go Mitt-Free
- You're using a gradual tanning lotion — these have lower DHA concentrations and are much more forgiving if blending isn't perfect
- You're doing a small touch-up on one area rather than a full-body application
- You're using a tanning water, mist, or drops mixed into moisturizer — these spread easily and blend with minimal effort
- You have disposable gloves ready to use as your barrier
- You've built up enough experience to apply quickly and evenly without a tool
Once your tan is looking great and you're ready to show it off, check out our guide to the best swimsuits for stretch marks — flattering options for every body type.
When You Really Should Use a Mitt
- You're using a dark, high-DHA formula — these develop fast and streak badly if blending is off
- You're tanning for a specific event and cannot afford mistakes that take days to fade
- Your skin is very dry, textured, or uneven — dry patches grab color much more aggressively, and a mitt gives you better control over pressure and distribution
- You're tanning over scarred skin, where you want the most gentle, even application possible. If scar care is part of your routine, our review of silicone scar sheets covers products specifically designed to support skin texture over time.
Self Tanner Application Without Mitt: Beginner Steps vs. Pro Techniques
If you're new to this, start with a straightforward process and work up from there. If you've been self-tanning for a while, there are a few techniques that take results to the next level.
Starting Simple: The Basic No-Mitt Method
Follow these steps in order every time:
- Exfoliate 24 hours before you tan. Use a gentle body scrub in the shower. Focus on knees, elbows, ankles, and any rough patches — these areas grip color more than smooth skin.
- Moisturize the driest spots. Apply a thin, unscented lotion to elbows, knees, and ankles right before you apply tanner. This prevents those areas from going too dark.
- Put on disposable gloves. Latex or nitrile — either works. This is your primary palm protection.
- Apply the tanner in sections. Do one body part at a time. Start with your legs, move to your arms, then your torso. Long, smooth strokes work better than short ones.
- Blend the edges carefully. Use a lightly dampened makeup sponge to feather the tanner at your wrists, ankles, and along your hairline so there's no hard line.
- Let it dry before dressing. Wait at least 10 minutes. Wear loose, dark clothing to avoid transfer marks.
- Rinse your hands right away after removing gloves, especially around the wrists where product may have touched skin.
Advanced Tricks for a More Natural Finish
- Layer thin coats instead of one heavy one. Two light applications with a few hours between them look significantly more natural and last longer.
- Mix tanning drops into your daily moisturizer for a gradual, buildable glow that's much easier to apply bare-handed without mistakes.
- Apply a thin coat of petroleum jelly or body oil to your hairline, eyebrows, nails, and knuckles before tanning — it creates a barrier so color doesn't over-develop in those spots.
- On your shins, where skin is thinner, blend downward in the direction of hair growth to reduce streaking.
- Use a foundation brush for your face if you're applying tanner there — a formula made specifically for facial skin is worth using separately.
Curious how long your results will hold? Read our detailed breakdown of how long self-tanner lasts and what you can do to stretch it further. Your prep work is the single biggest factor in how many days you get out of each application.
When your tan fades and swimwear season is calling, our picks for women's swim skirts offer a stylish and comfortable option while your tan builds back up.
Building a Routine That Keeps Your Tan Looking Great
A solid routine transforms self-tanning from a chore into something that just becomes part of how you take care of your skin. These habits make each application easier and every result better.
Pre-Tan Prep That Pays Off
- Exfoliate every 3–4 days between sessions to keep your skin smooth and ready for the next application
- Drink plenty of water — hydrated skin holds color more evenly and fades more gracefully than dry skin
- Shave or wax at least 24 hours before applying tanner, never after — fresh-shaved skin is too open and will absorb tanner unevenly at the follicles
- Avoid heavy body oils, thick creams, or silicone-based products on the day you plan to tan — they block absorption
- Keep up a consistent facial skincare routine if you're also tanning your face — a healthy skin barrier holds color more evenly and fades more predictably
Post-Tan Habits That Extend Your Results
- Moisturize every single day. This is the most impactful thing you can do. Apply lotion right after your shower while skin is still slightly damp.
- Pat your skin dry with a towel — don't rub. Rubbing mechanically exfoliates your skin and speeds up fading.
- Shower in lukewarm water rather than hot. Heat accelerates the breakdown of DHA in the outer skin layer.
- Avoid chlorinated pools and long soaks in baths for at least 24 hours after applying tanner — both strip color faster.
- Do a light top-up with a gradual formula every 2–3 days to maintain your color without doing a full application each time.
If you're planning a swimwear refresh alongside your tanning routine, our guide on how to shrink a swimsuit covers a simple fix for pieces that have stretched out over time.
Frequently Asked Questions
Can I use my bare hands for self tanner application without mitt?
You can, but it's not the best choice. Your palms absorb DHA quickly and will turn noticeably orange if you're not careful. If you go bare-handed, work fast, use a minimal amount of product, and wash your hands thoroughly immediately after. Rubbing a cut lemon or a paste of baking soda and water on your palms afterward can help lift some of the color.
Will a self-tanner look streaky if I skip the mitt?
It depends on your technique. Streaks are more about skin prep and blending motion than the tool itself. If you exfoliate, moisturize dry patches, and apply the tanner in long, smooth strokes with an even substitute like a latex glove or makeup sponge, you can get a streak-free result. The mitt just makes it a little easier — it's not the only path to a smooth finish.
How do I fix streaks after self tanner application without a mitt?
Act within a few hours for the best chance of correction. Gently exfoliate the affected area with a warm damp cloth or a light scrub. A mixture of baking soda and gentle body wash used in small circular motions can help lift the streaks. Once the area looks more even, let your skin rest before re-applying tanner to that spot with a light hand.
Final Thoughts
Getting a great tan without a mitt is completely within your reach — grab a pair of disposable gloves, prep your skin the night before, and follow the steps in this guide for your first try. Start with a gradual formula if you're nervous, build your confidence, and adjust your technique from there. Explore more skin, beauty, and body care tips in our wellness and lifestyle section — there's plenty more to help you feel great in your skin.



About Paulette Leaphart
Paulette Leaphart is a breast cancer awareness advocate and writer whose personal journey through diagnosis, treatment, and recovery shapes everything published on this platform. After experiencing the physical and emotional toll of breast cancer firsthand, she dedicated herself to creating a space where women can find honest information, community, and encouragement — covering beauty and personal care for people navigating treatment, fashion and style resources for survivors, and wellness content rooted in real lived experience rather than clinical distance.
About the Author

It's me Emily MacKenzie tried to make a documentary film about breast cancer according to the experience of Paulette Leaphart. Now it is no longer possible for some reason. But I'm not disappointed and I'm very hopeful that I can do something very positive that brings awareness to the women of the devastating disease ''Breast cancer". Just stay with me and keep supporting this platform; you will get update time to time and can know everything about ''Breast Cancer''.
You can get FREE Gifts. Or latest Free phones here.
Disable Ad block to reveal all the info. Once done, hit a button below